Sunday, August 30, 2015

Second Trimester Adventures!

     It's has been a little while since I've blogged.  I've been very busy finishing out the school year and baking this new addition :)  I'm very happy to be firmly in the second trimester, with the nausea and exhaustion behind me.  As with my last pregnancy post, I'm writing on the date listed and will publish when I move into the third trimester.

**PSA** I also noticed that some of my pictures are disappearing!  I can't figure out why.  I'm trying to repost them, but of course, some have been lost in the cyber world.  I'll keep working on it :)

Wednesday July 1, 2015 (19 weeks)
    I am officially on summer vacation and it's a perfect time to focus on mine and baby's health.  I am working part-time and taking some professional development workshops for the upcoming school year.  Other than that, I'm spending a lot of time sitting on the couch with my feet up.
     My nausea is still completely gone (expect for the random upset stomach) and I feel much better over all.  I still get sleepy early or after an activity (summer camp, grocery shopping, walking the dog), but I've learned to just come home and relax for a while each day.
     Nighttime sleeping comes and goes.  I've been having some indigestion and leg cramps that keep me up, tossing and turning.  Luckily, I can lay around during the day to make up for it.  One thing that I strongly recommend for any and all pregnant women is a good body pillow.  I may not be getting the deepest sleep, but I can lay down comfortably and read or just relax.  I have a Snoogle (a C shaped body pillow), thanks to a wonderful friend.  You can get them at any baby/maternity or home store or order online through Amazon.  It has been a life saver!
     I have also started getting really itchy!  As my stomach is stretching and growing, my skin is so dry.  My awesome hubby (from recommendations at his work), got me some Momma Bee Belly Butter.  It is marvelous!  I think I'm addicted to it :)  I use it twice a day; morning and before bed.  My skin is moisturized and has stopped itching for the most part.


     In other news, my appetite has most definitely increased!  I eat allllll day long.  I make very conscious decisions about the food I eat.  I plan for high protein, high calcium, lots of vitamins, etc.  I haven't gained much weight but the doctor says that baby is developing as planned.  Some snacks that I'm really loving right now are: cheese, yogurt, applesauce,  homemade fruit and yogurt smoothies, and peanut butter and jelly sandwiches.
     Speaking of baby and the doctor, we had an ultrasound at the end of June and baby is a BOY!!!!  We are very excited :)  We had some friends over that weekend to announce and it was awesome.  His name is Bryce David Thompson and we already love him to death.

I absolutely love hubby's reaction when we opened the envelope :)  Can you tell he wanted a boy???
Friday July 24, 2015 (23 weeks)
     Summer break is moving along quickly and baby Bryce is growing just as fast!  The biggest change is the size of my belly.  I'm gaining around one pound a week; with a total of 15 pounds gained.
     Unfortunately, with a growing belly comes tighter clothes.  I have purchased just a few maternity outfits.  I really don't want to spend a lot on new clothes that I will only wear for a few months.  Most of my existing tops still fit; I don't wear tight clothes and that's working to my advantage here.  I have also learned a great pants-widening trick.  Simply slip a hair-tie through the button of jeans or shorts to give yourself an extra couple of inches.  The extra room will stretch with the hair-tie for a little while.  Of course, you need to wear a longer shirt to cover up the "secrets," but it works like a charm!
     Aside from this little trick, I've found some absolute maternity must-haves for a pregnant summer in Florida.  Check those out here.

This picture was taken several weeks ago before the big belly starting growing.  It is still working!
     Another exciting change is feeling my little nugget move!  It's still very light because he's so small, but very fun and comforting to know that he's doing his baby things.


Sunday August 16, 2015 (26 weeks)
     Well, the belly is still growing!  I'm up to 20 pounds gained!  My goal at the beginning was to hit 35 pounds when all said and done.  I think I'm going to be right on the money.  I starting to feel the weight in my lower back and hips, so I try to stretch a little bit every day, usually right when I get up in the morning or before my shower at night.  I have learned that the warm (NOT HOT) steam and water really helps loosen up sore muscles.  I've also started a little workout routine, in addition to walking. I haven't been very consistent.  But I try!  I'll post it soon....
     Summer is quickly coming to an end.  I can't believe that teacher planning starts TOMORROW :(  It's always bitter sweet.  I enjoy the summer off but I love my job and am excited to get in and working (and of course, getting paid again is a bonus lol).
     In baby news, Bryce is growing as planned and all tests have been negative.  We have gotten some baby furniture and necessities, thanks to gracious parents AKA first time grandparents.  The baby shower and diaper party planning has fully commenced.  
    Bryce has become very active, almost all day long.  I love feeling him swim, kick and jab.  Sometimes it's uncomfortable and catches me off-guard, but I wouldn't have it any other way!
     Appetite is still increasing.  I think about food all day long.  I still watch what I eat and try to get veggies, fruit, dairy, and water in every day.  Some things that I'm loving: ice cream, peanut butter and jelly, smoothies, grapes, hamburgers and fries (oops), and Ranch dressing.

Sunday August 30, 2015 (28 weeks)
     I'm officially out of the second trimester!  It's crazy how fast time is flying.  Before we know it, Bryce will be here (ready, or not).  The biggest difference now, besides my belly and weight gain, is my hormones.  Little things have really started aggravating me.  For example, I'm over constant questions of how I'm feeling.  I'm also over slow, lackadaisical working.  I've always been "task-happy" but recently I find myself thinking, let me do your job too so I get out of here!  It's sad!  I've started just making my to-do list and sticking to it.  If it's not my job, I don't even notice it.  I haven't gone crazy at school yet (fingers crossed)!  Just breeeeaaathe.....
     I have started my bi-weekly appointments at the OBGYN.  Everything is moving along well with no major setbacks or struggles (knock on wood).  I won't have another ultrasound for a little.  I'm kind of torn about this one!  I understand that doctor's/nurse's know what they doing, but I want to see him!  How do I know he's still perfect?!?!  Anyways, they always do the heart Doppler, so I guess I'll just close my eyes and imagine him for now.
     Lastly, football season is finally here!  Only a few more months and we'll have a new team member to share these moments with.  I can't wait to show him off in all his Gator orange and blue!  Professional football teams will have to wait, though.  Our house is divided and Bryce'll be in charge of that decision (although Jaguar teal is a very handsome color ;).
     Thanks for reading!  I'm will start working on the next tri-chapter of this adventure ASAP!


Maternity Must-Haves

     Often times, people (not just the women) get wrapped up in the baby and completely forget about the mommies.  Don't get my wrong, the baby is the centerpiece but the mother-to-be is the table.  One thing I've quickly learned in my experience as a first time mom is that it's just as important for the me to be healthy and happy as it is the new arrival.  With that comes maternity clothing.
     I have never been a designer wearer or high end shopper.  I honestly never gave "maternity" clothing much thought.  I figured that I would wear looser clothes for a couple of months and call it a day.  Boy, was I mistaken!  Once I hit about 23 weeks, EVERYTHING became uncomfortable!  Even the thought of putting on clothes was tiring and aggravating.  Nothing fits right and with the summer heat, nothing is cool enough.  Sadly, we must wear appropriate clothing in public (contrary to some beliefs...but that's a whole other soap-box).
     I have been able to, luckily, stick to my guns and not buy much, but some things are just necessary (for my comfort and sanity).  I also try to buy non-maternity specific items, or things that I can wear after baby.  Obviously, pants and shorts are special, but tops, dresses, and skirts shouldn't have to be.  Of course, this whole idea depends on your personal body type and style.  I've worked hard to stay healthy and not gain extra extra weight.  The recommended healthy gain is 25 pounds.  I'm shooting for a total of 35 to be safe.  This really helps in the shopping department.  The smaller I stay, the easier to wear "regular" clothes.
     ***Disclaimer***  Some people have commented that I'm "starving the baby because I don't want to gain weight."  That is not true!  According to my OB, I'm growing and Bryce is growing exactly we should be.  I know myself and what healthy is for me.  Listen to your doctor for guidance here.  Every women is completely different and every baby is completely different.  You don't need to gain a literal extra person to have a healthy pregnancy.
     (Now back to the happy stuff!)  Here are the things that I couldn't live without as Bryce grows and I stretch!


1. Cotton skirts:  I have this knee-length and one maxi, both in solid black.  They are perfect are "dressing up" comfortably.  Neither of these are from the maternity aisle.  They stretch with me!

2. Sandals:  Depending on how much time you spend standing, shoes are going to become very important.  My feet have started swelling just a little but not too much.  Most of my sandals are still easy to wear and many can be loosen up if need be.


 3. Cotton shirts:  Target has a great collection of multi-colored crew and v-neck tees.  They are also pretty cheap!  I went and bought 5-6 in different colors at a size or two bigger than my regular medium.  Very loose and stretchy but also thin and comfy!

4. Dark maternity jeans:  I purchased two pairs of maternity jeans; one straight-legged and one skinny (seen here) from Zulily.  I bought both in a dark wash.  This particular pair has the full panel belly wrap.  The straight-legged is just the partial lower section.  I don't really have a preference.  Sometimes the full-panel is too restricting or hot.  I simply fold it in half.  I have noticed that the panel does provide some back pain relief.  Maybe it's the compression and support, or maybe it's all in my head :)

5. Flats:  If I'm on my feet for more than an hour or two (shopping, walking around, working, etc.), sandals sometimes don't work.  Simple ballerina flats are my next best option.  They are comfy and stretch a little with my giant feet.  Of course, this only works with the thin pliable variety.  Thicker, more formed flats are not be the same.  When it comes to pregnant feet, you'll learn quickly what works and what doesn't...trust me!


6. Tank tops:  With the summer sun high in the sky, I have turned to cute and simple ribbed tanks.  The ribbing actually allows for some stretch without that stretched-out, screaming look.  The top above is actually from the $5 table at Walmart...and yes, I went back and bought a total of five; in patterns and solids.  I think I may be obsessed.  The patterns are cute and the actual shirt is comfortable.  I now have a habit of walking by during a "grocery trip" to see if they've added any new colors!  Again, these shirts are not maternity specific, I just buy a size up...as I grow I will buy two sizes up...etc.

*Maternity jeans from #4...yes, I wear them more than once in a wash cycle sometimes.  I only have two, remember :)

7. Sports bras:  Another item that will become very important in maternity life is the bra.  With a growing baby and belly, comes the ever growing boobs.  They are, remember storing up all of the milk and nutritious little T will need in the early months.  Everybody is different and I have been super sore and uncomfortable.  I found that simple loose sports bras are my new best friends.  Yes, I have two "regular" bras (in enormous sizes), but I'm most comfortable in the thin cotton variety.  You'll find what works best for you!

8. Leggings:  We already know that yoga pants and leggings are way more comfortable than real pants.  This is extra true when pregnant.  Take advantage of it!  I wear them all the time with longer shirts.  My husband told me recently that when you are pregnant, you can wear whatever you want.  No one will question your fashion sense.  Well, thanks honey!

9. Tennis shoes:  As I said in #5, shoes are really important, especially for mommas who spend a lot of time on their feet.  Some people disagree with me, but I find my Nike tennis shoes to be a great option for shorter times of standing and/or walking.  I do notice that I have to sit with my feet up or take the shoes off when my feet start to swell.  Tennis shoes are not the most forgiving and provide great support (which, in turn, helps with knee and back pain).


10. Shorts:  Along with my two maternity jeans, I purchased one pair of shorts.  These are from Zulily and have the full panel.  They are very comfortable and are perfect for a hot summer day.

*Same as #3 just a different color :)


11.  Cotton dresses:  I have always been a fan of cotton maxis or knee length dresses.  They are thin and comfortable but also stretch when needed.  The maxi dress pictured is from my original closet, but I have since purchased several others.  These I can then wear after baby!

Friday, July 31, 2015

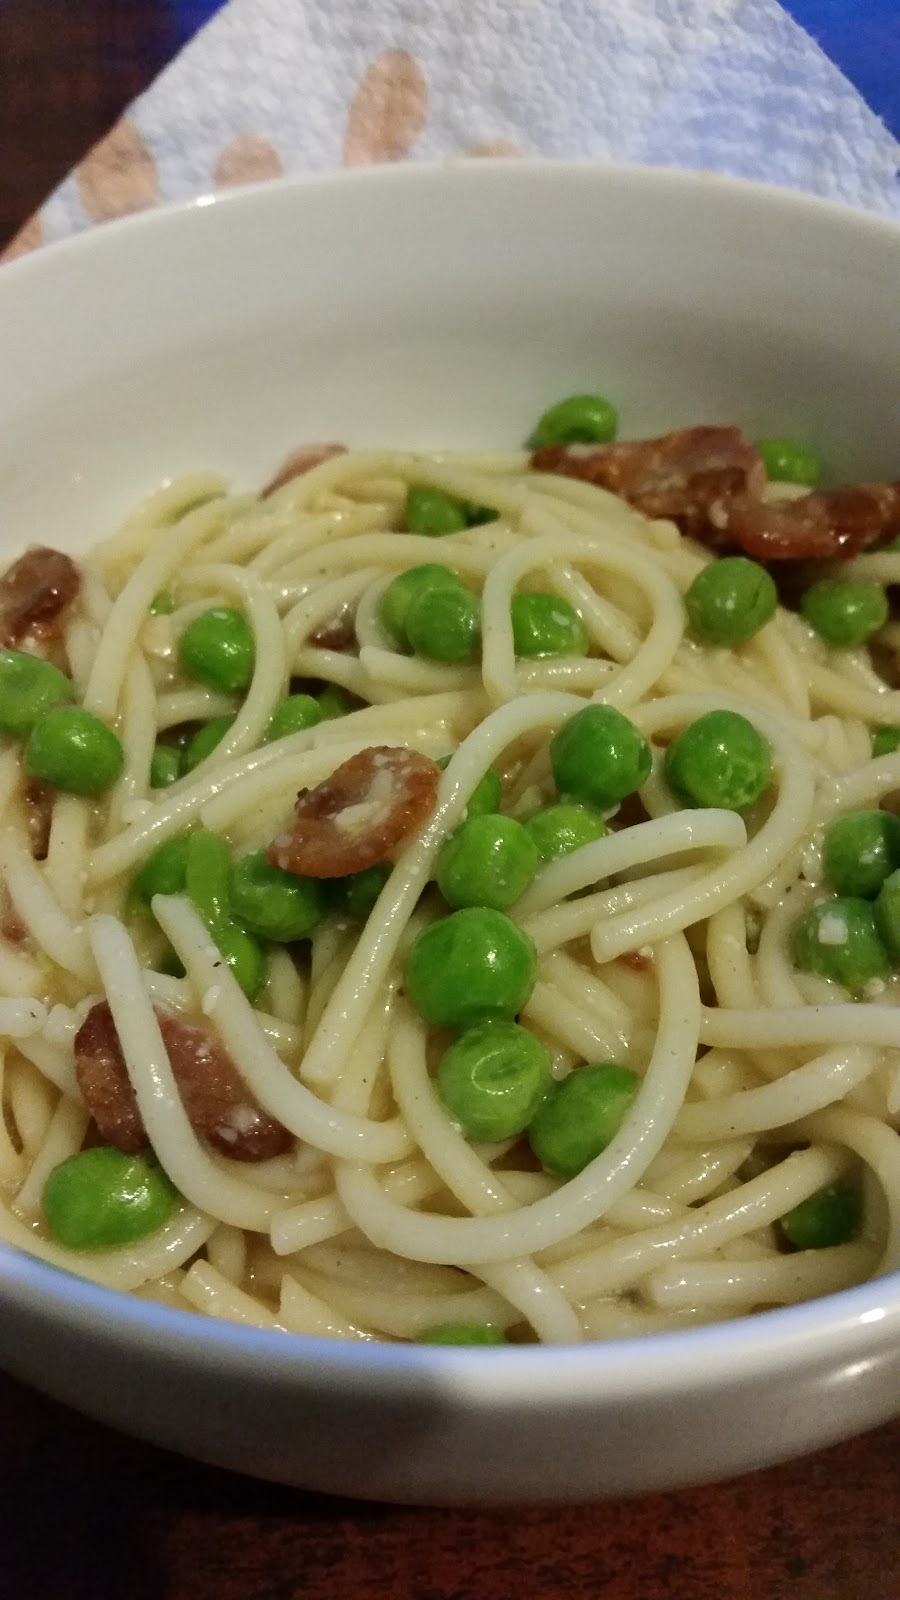
Spaghetti Carbonara

     I am definitely a pasta lover and I always love a quick, light meal.  I have become obsessed with this dish and make it all the time now.  It's perfect for a side dish, a "just me" lunch, or a light weeknight dinner.  It's super easy and uses ingredients I always have on hand.  Feel free to add different veggies or meats.  Chicken would be yummy for some extra protein.  You could also go meatless for a vegetarian supper.  Instead of, or in addition to, use frozen carrots.  Be creative and enjoy!

Spaghetti Carbonara (yields 2 servings)
Ingredients:
Canola oil cooking spray
4 slices of bacon, cut into bite sized pieces
4 ounces of thin spaghetti (can substitute any pasta here; use what you like and have)
1 tablespoon of all-purpose flour
1/2 cup of low sodium chicken (or vegetable) broth, room temperature
1/4 cup of reduced fat grated Parmesan
Salt and pepper, to taste
1 cup of frozen peas

Directions:
Prepare spaghetti according to package instructions.  Save some of the cooking liquid, just in case.

In a medium skillet over medium-high heat, cook bacon pieces in a little cooking spray.  When the bacon is completely cooked, remove with a slotted spoon.  Drain excess grease on a paper towel.  Leave a tablespoon of the bacon fat in the pan.  If you're skipping the meat, you will need a tablespoon of butter to substitute the fat.

Whisk in the flour.  Allow this to cook for a minute.  You don't want the raw flour taste in your delicious pasta sauce.  Slowly, whisk in the broth and bring to a simmer.  Continue whisking as you add the Parmesan, salt and pepper.  Start with a little salt and add as you taste.  You can add more but you can't take out!

Reduce the heat and gently stir in peas.  Give them a minute to heat through.  If your sauce is too thick, add some of the reserved pasta water.

Add the cooked pasta to the sauce and combine thoroughly.  Serve warm, topped with bacon and extra Parmesan.


Wednesday, May 20, 2015

Oh, Baby! Tales from the First Trimester

We have some exciting news!!!!  But SHHHHHH!  It's a little bit of a secret!

                                                                                     WE'RE HAVING A BABY!

     Since we are waiting until a few doctor appointments to announce this news to the world, I'm writing and postponing the publishing.  You'll notice a date next to each blurb.  That's the date I'm blogging.  This is going to be my pregnancy journal to track this super exciting time in our lives.  I am, by no means, an expert so this is a learning experience.  I'm excited to learn and share the good, the bad, and the ugly!

Tuesday March 24, 2015 (5 weeks)
     My husband and I have been trying since August to start our family.  It's very exciting and scary that it happened so fast!  I really don't think I was prepared for this.  I was honestly expecting pregnancy to take closer to a year, but here we are!  I haven't felt much of the infamous "morning sickness."  I have been nauseous and light headed, but nothing like I've read about.  I do get nightly indigestion, no matter what food I eat for dinner.  I can deal with that.  I hope this stays the same through out my journey...knock on wood!
     After the positive EPT, the next decision was when to announce our news to family and then the world.  I did some research (link posted at bottom).  We have decided to share with our families after the first doctor's appointment and then with everyone else at the end of the first trimester.  We are really excited and keeping this secret for even a few weeks is super difficult.  The agreement ended up being about what was best in the long run.  It's important, especially with such a huge life event, that we don't get ahead of ourselves.  We really want to make sure that little Baby T was doing it's baby things before getting everyone involved.  We will be announcing our new family member on Easter weekend, a couple of days after my first appointment at about seven weeks.  I decided to do an Easter themed announcement for family since it happened to be that weekend.
     I also have started taking my prenatal vitamins.  I was pretty nervous taking a vitamin since my multivitamins in the past usually upset my stomach.  I have been taking Nature Made Prenatal Multi +DHA and I haven't felt any discomfort.  I highly recommend them!


Monday April 27, 2015 (10 weeks)
     OK....we are moving right along.  Sadly, morning sickness (actually, all day sickness) has arrived.  :(  On the bright side, I feel the fatigue dissipating and the bump growing.  I'm not showing yet but I'm excited about that stage which is right around the corner!
     Nausea and vomiting have become a daily thing and each day is completely different.  It keeps me on my toes!  I have learned and researched a few things though that seem to help (links posted at bottom).   I have found bananas, ginger ale, peppermint tea, and eating bland breads and broths to be most helpful.  Also, I've started taking my vitamin at night after dinner.  The morning part of pregnancy sickness is much lighter this way.
     In brighter news, we visited the nurse and learned lots of exciting and overwhelming details of pregnancy and delivery.  Lots of things to plan for and get ready!  Some of the tools I've found the most helpful are the BabyCenter pregnancy app and the Publix baby club.  The app is a great way to keep track of what my body and what Baby T is doing.  It also has tools like a bumpie gallery, contraction timer, and registry wish list.  The Publix baby club is a free service from Publix that gives you access to coupons, specials, record, and a mommy blog.  You also get a free book!  I've only read the first chapter and have already gotten some great information.  It goes all the way from pregnancy to five years old.  It's like the manual for new humans... and it's free!  Nothing better than that.

Wednesday May 20, 2015 (13 weeks)
     I have successfully completed the first trimester!  We are super excited to see the first pictures of our little one :)  He or she is already perfect!   With confirmation from the doctor, we could officially announce the news to the world.  It's amazing how much love a little human can get!  Next month, we will find out the sex...we both hoping for a boy for our first time around.  We will see though!
     I also have some good news and some not so good news.  My fatigue is definitely getting better, but the ability to sleep soundly is slowly going.  Some nights are better than others, but I can see why everyone says to sleep whenever you can!  The "all day sickness" has pretty much stopped.  I still have an occasion day of sickness and have had to take some time off from work.  Headaches, stomach aches, and nausea are the usual suspects.  Gladly, when I called the doctor, I was told not to worried.  These things are normal...as long as they don't last too long or over consecutive days.  I feel good for the most part.  Baby T is growing and I'm really looking forward to our  next ultrasound date!


Saturday, March 21, 2015

Smoke It Up BBQ (food truck)

     Being from the south, BBQ is a common cuisine and is found on every street corner.  If you're anything like us, you don't want to eat at the chain restaurant every time you're craving BBQ.  That's what we love about this food truck!  Smoke It Up is a great alternative to the run-of-the-mill Sonny's or Bono's.  They specialize in dry rubbed wood smoked BBQ.  We have eaten there several times and it's always delicious; consistency is key to becoming a food fave.
     Smoke It Up always has a variety of smoked meats; chicken, pork, sausage, ribs, burgers, and hot dogs.  All are dry rubbed and smoked on hickory, cherry, and pecan woods.  They also have amazing real BBQ sides like smoked baked beans, mac n' cheese, and cole slaw.  And, last but definitely not least, they make their own pickles!  It's the perfect BBQ meal!

Check them out on Facebook or Smoke It Up BBQ Kitchen!

BBQ Pulled Pork sandwiches and Baked Beans at Aardwolf Brewing Company.


Friday, March 20, 2015

Crock Pot Lasagna

     As you can tell by many of my other recipes, I love my crock pot!  I love that I can set it and forget it.  It's perfect for busy weekdays and for lazy weekends.  It's also great for crowds.  One recipe that I love to eat but hate to make is classic red sauce lasagna.  Traditional lasagna requires boiling huge noodles then carefully layering.  Once (or if) you have the casserole filled with lasagna, it bakes then cools for a hundred hours.  By the time it's actually ready, I'm already ordering delivery!
     Ok...maybe that's a little over-exaggerated!  There's just something about lasagna making that I just don't like.  If you love all of the steps, then more power to you!  One twist on a traditional lasagna are my Lasagna Rolls.  This recipe still involves boiling noodles then carefully rolling the hot pasta.  Most of the time, I break a few and get really frustrated with it all.  Don't get me wrong, it's a delicious meal and occasionally finds its way to my menu, but it's not a favorite.
     My newest lasagna recipe is the complete opposite!  You don't have to boil noodles, you don't have to wait for hours, you really don't have to do a whole lot of anything...just the way I like it.  :)  The beauty of the crock pot is truly showcased here.  You literally layer and let go.  As with any lasagna recipe, you can make it different every time by adding meats and/or veggies or nothing at all. Be lazy one day night this week and enjoy!
Crock Pot Lasagna
Ingredients:
16 oz. ricotta cheese
1 egg
1/4 cup grated parmesan cheese
1 tbsp. Italian seasoning
9 lasagna noodles (uncooked!!!)
1 and 1/2 jars of red sauce (add your sauteed veggies and/or browned meat here)
8 oz. shredded mozzarella cheese
cooking spray
Directions:
In a small bowl, combine ricotta, egg, parmesan, and seasoning.  Be careful if you're a taster (like me).  This mixture contains raw egg.
Spray the inside of your Crock Pot with cooking spray.  This will help the lasagna come out easily.
Begin layering with sauce (just enough to cover the bottom or about 1/3 of the total).  Then, break three noodles to fit.  Next, gently spread half of the ricotta mixture.  Lastly, sprinkle half of the mozzarella over the top.  Continue these steps one more time.  Sauce - three noodles - the rest of the ricotta - the rest of the mozzarella.  Finally, add the last three noodles and the rest of the sauce.
Cover your Crock Pot and cook on low for five to six hours.  30 minutes before serving, take the inside of the slow cooker out and let it cool.  This step really helps the cutting and serving process.  You'll get a perfect square every time.  So yummy!
***Picture coming soon!  I couldn't snap one fast enough :)

Thursday, March 19, 2015

"Life of Pi" by Yann Martel

     In 2012, a great movie titled "Life of Pi" came out in theaters.  I went and saw the film and was immediately blown away with the story, theme, and imagery caught on camera.  I had heard of the classic novel but never had a chance to read.  After seeing the movie, many conversations comparing and contrasting the film and book left me wondering.  Should I read the book now, after seeing the movie?  Should I chalk this novel up to "already been watched?"  I decided to try it out.  If I couldn't get into after the first few chapters, I could at least say I gave the effort.  Therefore, I went into this book a little skeptical.  Don't get me wrong, the movie was amazing and I will watch it again and again.  But the book....after being [ruined] by the movie?  I wasn't so sure....
   As soon as I brought this book home from the library, I started reading.  From the very first chapter, I was hooked!  As always, book-made-movies can never fully portray what the original author has written.  Luckily, Life of Pi (in my opinion) came pretty darn close!  The novel's imagery made it very easy to get lost in this story.  I felt like I was shipwrecked with Pi!
     I also loved the narrative structure of Yann Martel's fantasy adventure.  Throughout the novel, Pi (as the main character) and Yann Martel himself (as a visiting author years later) tell this amazing story with alternating points of view.  This really brings the plot to life and creates a realistic versus fantasy juxtaposition.  I could not put it down!
     With these two narrators, I was really curious how the author would bring the novel to a close.  A lot of times, great books fall apart towards the end.  With such an intricate story line, the closing was either going to be outstanding or completely underwhelming.  The end is just perfect!  The reader is left to decide whether or not to believe Pi's whimsical story.
     If you have not read this book (even if you have seen the movie), it is a must-read!  You will not be disappointed.


Saturday, February 21, 2015

Quick No Fail Pancakes

   It has been a loooong while since I've posted to my blog, but life has been super busy!  I hope everyone had a great holiday season (New Year's being my favorite).  With the new year comes many new and exciting things in our house.  We are now well into the "married club."  That means that it's time to look for a house and think about kids....exciting, busy, scary, nerve-wracking.   I'm sure I'll be posting plenty of things on those subjects as the time goes on!  For today, I'm sticking with ol' faithful...the kitchen.
     For today's "in the kitchen..." post, I'll be sharing a recipe for something that honestly terrified me when I first starting cooking for myself and my husband.  Pancakes!  Yes, I said pancakes!  Maybe they're not as scary to you, but for me, these little disks of batter were the bane of my existence.  My husband (then boyfriend) would always request pancakes for Saturday morning breakfast.  I would always make them with false confidence, not wanting to seem incompetent, and fail.  They would either burn to a crisp or come out dough and inedible.
     Well, the good news is, I have conquered the pancake!  I have actually already posted my Pumpkin Pancakes but this is the standard pancake batter that comes out perfectly every time!  Of course, you can add blueberries, chocolate chips, or really anything you like in a pancake.  Many times, I make the plain pancakes then top them with whipped cream and a variety of fruit.  So yummy!

Quick No Fail Pancakes
Ingredients:
margarine (for buttering the skillet)
cooking spray (for the skillet also)
2 cups plus 2 heaping tablespoons of all purpose flour
1/3 cup of sugar
1 teaspoon of salt
1 and 1/5 tablespoons baking powder
1 egg
1 and 3/4 cups of fat free milk
3 teaspoons of vanilla extract

Directions:
Make the batter first so that it can sit a minute before cooking.  In a large bowl combine all of the dry ingredients.  Whisk these together so that they are thoroughly combined.  You could also sift the dry together if you're worried.

Add the wet ingredients into the dry and whisk completely.  Some lumps are okay but you don't want huge balls of flour in the batter.  Let the batter sit while you prepare the cooking surface.  This will help everything come together for the perfect pancake.

Heat a large skillet over medium heat.  You don't want it to get too hot, then the pancakes with become burnt and crispy.  I use cooking spray and margarine just to ensure a clean flip.  I do spray about every two pancakes, but butter under each pancake.

After the skillet is hot and buttered, use a 1/3 cup measuring cup to dollop the batter in the center.  If you're using blueberries or chocolate chips, now is the time to sprinkle those on top.  When the edges of the batter begin to form bubbles, gently flip your pancake.  Allow a couple of minutes to cook on the other side.  Remove this pancake and begin the next with the same procedure.  If you have a griddle, you can do more than one at a time.  Enjoy!


Monday, December 29, 2014

Meatball Stroganoff

     I have always been a pasta lover.  Red sauce, cream sauce, meat, or no meat...it doesn't matter!  I could curl up on the couch with an overflowing bowl of pasta any given day.  Unfortunately, pasta can get played out.  For the not-so-enthusiastic pasta lover, pasta dishes often become boring and mundane.  This recipe was an attempt to spice it up!
     Your typical stroganoff dish is egg noodles under a creamy mushroom sauce with chopped beef.  This stroganoff is very similar but uses Italian meatballs as the protein.  This pasta dish is new, improved, and husband-requested.  It has found a permanent spot on our menu.  Enjoy!

Meatball Stroganoff
Ingredients:
Olive oil
Frozen meatballs (enough to fill a single layer of a large skillet)
Half of a bell pepper, diced
2 cups of beef broth
1 1\2 teaspoons each of dried parsley, oregano,and basil
Salt and pepper, to taste
1 cup of light sour cream
1 cup of heavy whipping cream
Half a bag of wide egg noodles
Parmesan cheese
Directions:
Brown meatballs in a large skillet with a touch of olive oil. I usually just follow the directions on the bag.  Add bell peppers until softened. Prepare egg noodles in boiling salted water. 
Add beef broth to the meatball skillet.  Raise the heat so the liquid begins to simmer.  Add your seasoning.  Stir to incorporate.  Add sour cream, again stirring so that it melts into sauce.  Finally, add the cream.  Let sauce simmer for 5-10 minutes, or until the sauce is creamy and thick.
Add drained egg noodles to the sauce mixture and serve with a flurry of grated Parmesan.


Tuesday, December 23, 2014

Holiday Cookies

     I absolutely love the holidays....two reasons, I have a few weeks off from work to relax AND I get to bake, cook, and indulge in delicious food treats!  This post is all about the cookies I made for Thanksgiving and Christmas.  These are perfect as homemade gifts or just to have out for guests.   Please try these and enjoy your families this and every holiday season.  :)

White Chocolate Cherry Shortbread Cookies
Ingredients:
1 cup (2 sticks) unsalted butter, room temperature
1/2 cup confectioners sugar
2 cups all-purpose flour
1/2 teaspoon salt
1 cup maraschino cherries, chopped
1/2 cup white chocolate chips (you could use milk or dark...or make some of each)
1/2 tablespoon vanilla extract

Directions:
Cream the butter and the sugar in a medium bowl.  In another bowl, mix the flour and the salt.  Mix the dry ingredients into the wet until it starts forming larger clumps.  Mix in the maraschino cherries, white chocolate and vanilla extract.  Dump out onto a piece of parchment paper.

Form the dough into a rectangular log, wrap it in plastic and let it chill in the fridge for at least an hour. 

Preheat your oven to 325 degrees.  Cut the log into 1/4 inch thick slices and place them on a parchment lined baking pan with one inch of space between them.  Bake until they just start to turn lightly golden brown on top, about 10-15 minutes.

Let them cool completely before packaging them up.


White Chocolate Pumpkin Spice Snicker-doodles
***Yes, as I'm typing, I just realized the commonality here.  White chocolate is my favorite chocolate and I use it often :)
Ingredients:

(For cookies)
1½ cups sugar
½ cup butter flavored shortening
½ cup butter
2 eggs room temperature
1 TB vanilla
1½ tsp. cream of tartar
2¾ cup flour
1 tsp. baking soda
⅛ tsp. baking powder
½ tsp. salt
3 tsp. pumpkin pie spice
⅔ cup white chocolate chips

(For sugar coating)
3 tsp. cinnamon
4 TB sugar
1 tsp. pumpkin pie spice

Directions:
Cream butter, shortening and sugar in a mixing bowl.  Add eggs and vanilla and cream together.

In a separate bowl combine cream of tartar, flour, baking soda, baking powder, pumpkin pie spice and salt.

Gradually add the dry mixture to the creamed mixture and mix until well combined.  Add white chocolate chips and stir (with a spoonula) until well combined.

Cover with foil and refrigerate for 30 - 45 minutes.

Preheat oven to 375 degrees. Combine the "coating" sugar, cinnamon and pumpkin pie spice in a small bowl. 

Form dough into small balls, roll in sugar/cinnamon mixture and then place on a greased cookie sheet.  The dough is pretty sticky.  Have a small bowl ready with water to dip your fingers tip in.

Bake on a parchment lined cookie sheet for about 8 minutes.


Saturday, December 13, 2014

Pumpkin for Breakfast

     One thing I absolutely love about the fall season is PUMPKIN!  It's may favorite flavor of the holidays.  I love pumpkin coffee, beer, cupcakes, cookies, ice cream, annnnnd these two awesome breakfast recipes with pumpkin as the star.

Pumpkin French Toast:
Ingredients - 
3/4 cup milk
1/2 pumpkin puree
4 eggs
2 tablespoons light brown sugar
1 teaspoon vanilla
1 teaspoon ground cinnamon
1/4 teaspoon ground nutmeg
1/4 teaspoon ground ginger
10 slices of bread
Butter, for skillet or griddle

Directions - 
Preheat a non-stick skillet set over medium heat.  In a mixing bowl, whisk together milk, pumpkin, eggs, brown sugar, vanilla, cinnamon, nutmeg, and ginger.  Mix until well combined.  Pour into a shallow dish.

Butter skillet and dip bread into egg mixture.  Allow bread to absorb mixture for a few seconds.  Rotate to coat all sides.  Transfer slice of bread to the skills and cook until golden brown on bottom.  Flip (you may need to butter again) and cook on the opposite side.  Serve with warm butter and maple syrup.


Pumpkin Pancakes:
Ingredients - 
2 cups AP flour
1 tablespoon + 1 teaspoon baking powder
1 teaspoon salt
2 tablespoons sugar
1 teaspoon cinnamon
4 large eggs, separated
1 1/2 cups milk
1 cup pumpkin puree
1/2 butter, melted

Directions - 
In a large bowl, combine flour, baking powder, salt, sugar, and cinnamon. Make a well in the center of the mixture.
In a small bowl combine egg yolks, milk, pumpkin, and butter. Add to the dry ingredients; stirring until the dry ingredients are just moistened.
Beat egg whites at high speed with an electric mixer until stiff peaks form. Fold the egg whites into the pumpkin mixture.
Pour about ¼ cup of batter for each pancake onto a hot, lightly greased griddle. cook until the tops are covered with bubbles and the edges look cooked; flip and cook the other side.


Easy Peasy Mac 'n' Cheesy

     One staple of any American kitchen is the humble macaroni and cheese.  Everybody has their theory on the "secret" ingredient and there's really no way to mess it up.  It represents comfort and love in a bowl!  This particular recipe was seen on an episode of The Kitchen on Food Network.  It takes only a few minutes and uses ingredients that you probably already have.  The measurements below will make a family-sized portion, but can be tweaked for whoever you're cooking for.  This mac 'n' cheese is easy peasy!  Enjoy!

Easy Peasy Mac 'n' Cheesy:
Ingredients - 
1 cup heavy cream
1 ounce cream cheese, room temperature
1/4 cup garlic powder
1/2 cup grated or shredded cheddar
2 slice American cheese
3 cups prepared pasta
Salt, to taste

Directions - 
Heat the heavy cream in a skillet over high heat.  Be careful that it doesn't boil.  Continue heating until edges start to bubble.   Stir in cream cheese, salt, and garlic.  Whisk so that everything in incorporated.  Allow to cook for a little bit so that the mixture thickens.  Add the cheddar and American cheese and continue whisking.  Pour the sauce over the pasta and serve immediately.  So yummy!


Sunday, November 30, 2014

Our future's so bright...

     This school year's theme is "Our future's so bright, we just gotta wear shades!"  It's very unique, but very difficult for me to wrap my head around.  I mean, I get it and it's a great motto, but how on earth do you decorate a classroom for this???  I have never really decorated and filled my walls (it's clutter-y and overwhelming.....just sayin'), so I don't know why I was so bothered by this.  Anyway, after I got over the decor, the real struggle came when planning the opening week.
     I always begin the school year with a discussion about goals and dreams.  It really sets up a great classroom environment of goal-setters and diversity.  These activities also lead into my monthly character education read alouds (check out ....Bad Case of the Stripes).  As I was wrapping my head around, and google-ing, some "bright future" activities, I ran across this one.  I'm not sure where I saw it but I adapted it for my third graders.
     First, we talked about setting goals and having a dream for the future.  Then, each student wrote down one big goal for either this year or for the future.  After that, we talked about how people meet their goals; whether through education, hard work, etc.  Finally, my Bright Learners, wrote about their goal and how they were planning on meeting that goal.  They did a great job and really impressed me with their thinking.   For a display board, they wrote on a big cut-outs of sunglasses (see what I did there?).  This made for a great Orientation/Open House display for parents.


Wednesday, November 26, 2014

Lasagna Rolls

     Spaghetti is a classic dinner option in most American homes...ours is no exception!  I absolutely LOVE tomato sauce and pasta.  This recipe is a spin on the classic: Lasagna.  I came across this "rolled up" idea on Pinterest and just ran with it.  Now, I make Lasagna Rolls at least once a month.  I really love this recipe because you can add anything you would in a traditional lasagna.  It's nothing fancy but makes pretty and perfect portions (easy for eating now and packing up for later).  Enjoy!

Lasagna Rolls
Ingredients:
1 lb. lasagna noodles
15 oz. fat free ricotta cheese
1 cup shredded mozzarella
1/4 cup grated parmesan
1 large egg
10 oz. frozen spinach (thawed and squeezed dry)
2 1/2 cup marinara sauce
salt and pepper, to taste
non-stick cooking spray
***You can always add some other fillings!  For my meat-eating husband, I'll toss in some browned ground turkey.  For my vegetarian sister, I'll add sauteed mushrooms.***

Directions:
Bring a large pot of salted water to a boil.  Cook lasagna noodles to al dente.  Drain in a colander and set aside.  They will take between 12-15 minutes.

While your noodles are boiling, prepare your filling.  In a bowl, combine egg, spinach, mozzarella, parmesan, ricotta, and a dash of salt and pepper.  ***Here's where I would add the meat or mushrooms.***

Preheat your oven to 400 degrees and spray a casserole dish with nonstick cooking spray.  To fill the noodles, lay them flat on a cookie sheet (You may need to spray this also.  Sometimes, mine stick.).  Spoon some of the filling into the middle of each noodle.  Carefully roll them up and place them seam side down into your casserole dish.  This may get a little messy but that's ok!

Ground turkey and cheese filling...yummy!
Pour the marinara over your roll ups.  Make sure the liquid gets all around each roll.  This is what will keep the lasagna moist as it cooks.  Cover with tin foil and bake for 30 minutes.  Serve with a side veggie or garlic toast.  Enjoy!


Monday, November 17, 2014

Crock Pot Chicken Chili and Corn Muffins

     Now that the weather is cooling down, it's time for some yummy soups, stews, and chili.  One of my favorite recipes is [of course] made in the crock pot and [of course] chicken.  This chicken chili couldn't be easier and is so delicious.  It definitely leaves you with hot soup belly.
     As my side, it's only logical to make corn muffins.  :)  This recipe is also pretty easy.  I usually freeze half of the batter for a weekend breakfast or just the next time I made this chicken chili.  The muffins are also great with a dollop of jelly the next day.  Enjoy!

Crock Pot Chicken Chili
Ingredients:
1 can of black beans, drained and rinsed
1 can of corn, with liquid
1 can of Rotel tomatoes, with liquid
1 package of Ranch dressing mix
2 chicken breasts, frozen
1 cup of onion, diced
1 tablespoon of olive oil
2 garlic cloves, minced
Salt and pepper, to taste
1 8oz. package of reduced fat cream cheese

Directions:
In a skillet, heat the olive oil over medium heat.  Saute onions for several minutes, until beginning to soften.  Add minced garlic.  Be careful not to burn the garlic.  It'll only need a few minutes...long enough to become fragrant.

Spray your crock pot with nonstick spray.  Set to low and add "cooked" onions and garlic, seasonings, beans, tomatoes, and corn.  Nestle the chicken in; making sure that it's covered with the other ingredients.

Dollop cream cheese over the top of everything else.  Cover and cook for 8 hours.

Before serving, shred chicken and stir thoroughly so that everything is incorporated.

Corn Muffins
Ingredients:
3 cups of AP flour
1 cup of sugar
1 cup of corn meal
2 tablespoons of baking powder
1 1/2 teaspoons of salt
1 1/2 cups of fat free milk
1/2 pound of unsalted butter, melted and cooled
2 large eggs
Muffin or cupcake liners

Directions:
Preheat oven to 350 degrees.  Line 12 muffin cups with liners.  In a large bowl, combine dry ingredients.  In another bowl, combine wet ingredients.  Slowly pour wet ingredients into the dry and mix, using a hand mixer on a low speed.  Stir until just blended.

Spoon batter into liners, filling to the top.  Bake for 30 minutes.  Use a toothpick to test.  Let cool slightly and remove from the pan.


Monday, November 10, 2014

Strength training:"Baby Got Back" Glutes

     One troublesome body part of most women is their gluteus maximus...at least for me it is!  Either I'm filling out my pencil skirt or I'm squeezing into my favorite jeans.  For me, my butt never seems to look the way I want it to.
     For this workout, I targeted just my back side.  The exercises are simple and easy but definitely burn!  With time and persistence, I'll be donning sexy skinny jeans and a cozy scarf in no time!

"Baby Got Back" glutes
*Repeat routine three times with one minute rest between each set*

15 donkey kicks, each side
15 glute bridges
15 forward lunges, each side
15 squats
15 pile squats
15 side lunges, each side


Hasselback Chicken

     If you've read any of my previous recipes, you know that chicken is a common protein in my house.  Unfortunately, chicken can get rather redundant and boring.  Here's an easy twist on simple baked chicken breast.

Hasselbeck Chicken

Ingredients:
2 chicken breasts
2-3 slices of deli meat (I used turkey breast)
2-3 tablespoons of shredded cheese (I used Mexican blend)
2 tablespoons light or low fat mayo
Salt and pepper, to taste
Teaspoon each of garlic powder and dried parsley

Directions:
     Preheat oven to 350 degrees.  Place chicken breasts onto a greased baking sheet.  Using a pairing knife, make three to four slits in the top of each breast.  You want them deep enough to fill but not all the way through.  Fill each slit with cheese and deli meat.
     In a small bowl, combine mayo and seasonings.  Spread mixture over each chicken breast.  Bake, uncovered for 20 minutes.  Enjoy!


Hasselbeck chicken served with green beans and tomatoes and brown rice with spinach.


Bad Case of the Stripes

     Each year, I try to incorporate some character education within my reading and writing curriculum.  I feel that it's a lost subject in today's high-rigor schools.  What I do is very simple and takes maybe 20 minutes every couple of weeks (the goal is twice a month but sometimes that just doesn't happen).  I find a read aloud that has a message; sometimes these are broad, other times I target misbehavior occurring within the classroom (bullying, stealing, tattle-telling, etc.).  After reading and discussing, I plan a simple activity to post in the room and then send home.  We refer back to this activities if needed.  It's amazing ho powerful these little things are and it really builds a strong classroom community!
     This particular activity is great for the beginning of the year.  It's a read aloud of David Shannon's Bad Case of the Stripes.  The moral of this story is to be yourself no matter what the people around you are doing.  This is a well-loved story and the kids really get into it!  I've found that if the teacher is 100% invested, the kids will by-in quickly and the activity will stick.  I completed this activity a month or so ago and my third graders still say things like, "Remember that Camilla was scared at first" or "Don't forget to be yourself even if you really do like lima beans."  It's awesome!
     After reading, I had the kids write about a time they had to "be themselves" even though it was against what other's were doing.  I went around and took each student's picture (just a head shot).  I printed them out in black and white.  The kids, then, gave themselves dots, stripes, spots, etc.  We created a bulletin board with a quote from the story.
     I loved teaching this activity and I loved watching my class learn and grow as whole children!  I will definitely continue planning these activities, no matter how crazy busy our schedules get.  Look for more updates :)


"When Camilla stops trying to please everyone else and isn't afraid to be who she really is, her bad case of stripes goes away."

Sunday, October 19, 2014

Get off me bro! At-Home ideas for fleas...

     With any four-legged friend comes the pesky flea.  Well, today, I've had enough!  Recently, Maverick (our five year old German Shepard mix) has come down with a bad case of the fleas...and yes, that's a reference to the David Shannon book that only teacher-people will understand.  I wish that the simple lima bean was the answer, like in the story, but unfortunately, with fleas, it's never that easy.
     Now, first and foremost, I'm by no means an expert in the art of flea removal...I'm just sharing my experience.  Also, I do take Mav to the vet regularly and he is on monthly flea and heartworm protection.  Lastly, my pup is special...in the sense that he's my dog.  I would never do anything intentionally to hurt him.  We are also very close (just ask my husband!).  We did (Maverick and I) have a conversation about the fleas and what I was going to try.  I know I'm a weirdo but that's my business!
     Moving forward, I decided that I had to try something.  His September dosage of flea prevention didn't last the entire month and I can't just re-up half way through (too many chemicals).  So until then, I did some research and found several different things that I can do around the house to alleviate some of the itching and irritation.  [I looked at several different online sources, so I posted the links at the bottom if you're interested.]
     One of the most important things for keeping you and your pets healthy is cleaning.  Mind-blowing, I know!  My husband and I have a great routine of weekly cleaning every Sunday.  It's the best way for us to get all of the housework done within our crazy schedules.  Bathing the pup, vacuuming, and laundry (sheets, blankets, dog bed, etc.) are what I found to be essential in flea removal/prevention.  Makes complete sense and you're probably already doing it!
     Another thing that is complete common sense...but often overlooked (in my case, specifically)...is the outside environment.  We live in a complex with a lot of nature.  This is awesome for the view and dog walking ability, but not so great for flea prevention.  These pesky critters live in tall grass and bushes waiting to grab a hold of the pup.  There are several things you could do.  One is to avoid walking in woods and areas with tall grass.  I've also seen doggie socks that can shield your pup's legs from unwanted hitchhikers.  Lastly, you can wipe down your pet's legs when they come inside from walking or playing in grassy places.  This will help knock off any bugs or, even, bacteria that may have joined your dog.
     Another thing I decided to try is a "lemon brush."  This one's easy and has multiple benefits!  Fleas are known for being sensitive to citrus.  They are repelled by the smell.  The lemony freshness is also great for doggie odors!  Simply make a lemon water solution...two lemons sliced in water with a dash of salt.  After a hard boiling and steeping, cool your water and store in the refrigerator.  I use a sponge and rub Maverick down with the lemon water twice a day (once before I leave for work and once before I go to bed).  
     The last thing I decided to try is mixing apple cider vinegar is his food.  I do a teaspoon of ACV with two tablespoons of wet dog food and 1 1/2 cups of dry food...once for breakfast and once for dinner.  I was worried that Maverick wouldn't eat it because of the vinegar smell, but, surprisingly, he gobbled it right up!
     Today completes a week with these remedies and we have definitely noticed some changes.  The number of fleas spotted on Maverick has significantly decreased.  I can not say that he's flea-free but it is working marvelously.  I will continue these routines since none of them are chemical based or harmful.  The only thing that we're still struggling with is the dry and itchy skin.  I'll get back to you on that!

Here are the links of some of the websites I found:
http://everydayroots.com/flea-remedies
http://www.petmd.com/dog/wellness/evr_multi_flea_control
http://analilscorner.wordpress.com/2013/08/09/flea-and-tick-remedies-for-dogs-part-2/

Monday, September 22, 2014

Getting Back on Track

     With a wedding and honeymoon this summer, then the busiest of "back to school" this August, several things have fallen to the wayside.  I feel like I haven't blogged in years and I know I haven't seen the inside of a gym in two months.  It's all about to change!  My goal is to post at least once a week and to get back in the gym on the reg...  What I need is a plan of attack!
     In my research of workout routines, I actually found some great ideas.  The exercises in this post came from a ten week workout schedule.  I decided to change it up a little bit and do these simple routines three days a week and try some HIIT or interval training the other three days.  I know that it's quite ambitious, but those are the best goals to beat!
     To make it even crazier, I also want to work on my run game and start small wake-up workouts.  I know, I know....I'm tired just typing it  Those will be a different post (let me not get ahead of myself)!  The three workouts below are simple yet challenging and require zero equipment.  They can, as always, be modified for your specific needs and level.  The idea is for these to fall Monday, Wednesday, and Friday but it'll really be whenever it fits in my schedule.  Stretch, drink plenty of water, and have fun in your workout!  Just think about those sexy skinny jeans :)

Workout #1
***These totals do not have to be completed all at once.  For example, I usually do 50 jacks at the beginning, 50 more half way through, then 50 at the end.  Do whatever works to reach the total.***

150 jumping jacks
50 crunches
20 tricep extensions
30 squats
20 walking lunges
70 Russian twists
20 calf raises
5 push ups
:30 plank

Workout #2

60 jumping jacks
50 reverse crunches
20 sit-ups
15 tricep extensions
20 squats
10 side lunges (each side)
15 leg lifts (each side)
50 bicycles
15 push ups
40 Russian twists

Workout #3

50 jumping jacks
100 Russian twists
20 squats
5 push ups
1:00 downward dog
20 walking lunges
10 side lunges (each side)
20 bird dogs
20 inner thigh lifts (each leg)
15 incline push ups